常見的關聯類型
| 關係類型 | 說明 | ForeignKey | relationship |
|---|---|---|---|
| 一對一 (1:1) | 每個 user 對應一個 profile | Profile.user_id 並設 unique | uselist=False |
| 一對多 (1:N) | 一個 user 有多個 post | Post.author_id -> users.id | User.posts / Post.author |
| 多對一 (N:1) | 多個 post 對應一個 user | Post.author_id -> users.id | User.posts / Post.author |
| 多對多 (M:N) | 一篇文章有多個標籤,一個標籤對多篇文章 | 需要中介表(association table) | 兩邊都用 relationship(..., secondary=...) |
以下我們來看一下 1 對多的關聯吧
一對多關聯 (1:N)
我們要呈現 一個 writer 有多篇 post,多篇 post 也可以對應到同一個 writer.
因此,當我們完成這個範例時,一對多及多對一的關聯性都會被建立。
我們主要會建立 writer 和 post model
主表 models/writer_models.py
這邊我們主要加入 posts 欄位與 Post 做關聯,注意沒有加上 uselist=False,代表可以允許多個 posts
1
2
3
4
5
6
7
8
9
10
11
12
13
14
15
16
17
18
19
20
21
22
23
24
25
26
27
from sqlalchemy import Column, Integer, String, ForeignKey
from sqlalchemy.orm import relationship
from db.database import Base

class Writer(Base):  # 繼承自 SQLAlchemy 的 Base,代表這是一個資料表模型
    __tablename__ = "writers"  # 資料表的名稱會是 writers

    id = Column(Integer, primary_key=True, index=True)
    # 主鍵(Primary Key),自動遞增的整數,唯一識別每個 writer
    # index=True:建立索引,提高查詢效率

    name = Column(String)
    # 作者名稱,儲存為文字欄位,沒有設 unique,代表可以重複

    email = Column(String, unique=True)
    # 作者的 email 欄位
    # unique=True:要求每個 email 必須唯一,不可重複(避免重複註冊)

    profile = relationship("Profile", back_populates="writer", uselist=False)
    # 定義與 Profile 模型的一對一關聯
    # "Profile":指向另一個模型的名稱
    # back_populates="writer":Profile 端也會有 writer 欄位,雙向連結
    # uselist=False:表示這是一對一,而不是一對多(否則會變成 list)

    # 一個使用者有多篇文章
    posts = relationship("Post", back_populates="writer")
models/post_models.py
1
2
3
4
5
6
7
8
9
10
11
12
13
from sqlalchemy import Column, Integer, String, ForeignKey
from sqlalchemy.orm import relationship
from db.database import Base

class Post(Base):
    __tablename__ = "posts"

    id = Column(Integer, primary_key=True, index=True)
    title = Column(String)
    content = Column(String)

    writer_id = Column(Integer, ForeignKey("writers.id")) # table 的欄位名稱
    writer = relationship("Writer", back_populates="posts") # model Class 名稱及該 Class 下對應的欄位名稱
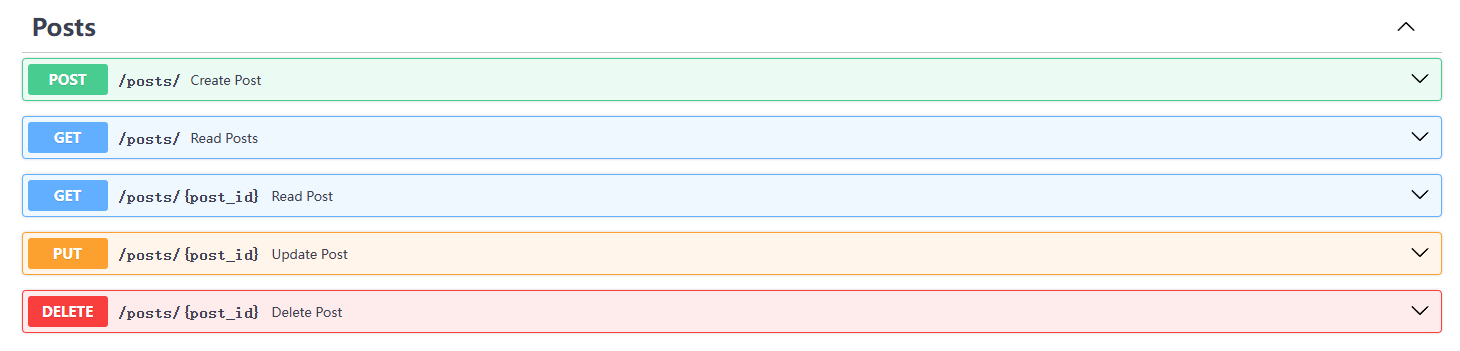
執行
一樣,我們直接由對應的 openapi 去操作,看看結果吧
Writer 部分

Post 部分
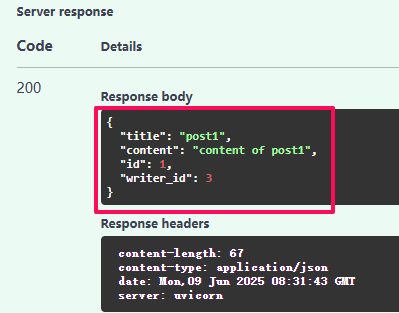
新增一個 Post 在 writer 下
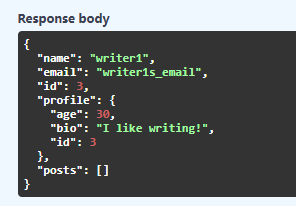
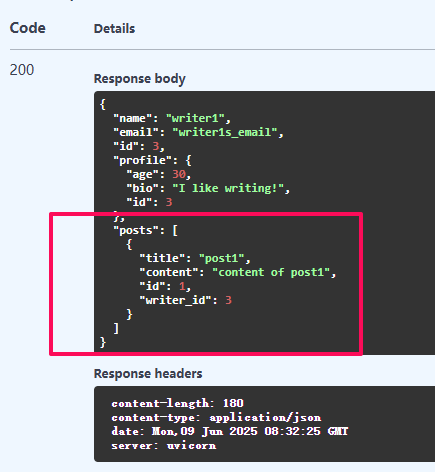
查看該 writer 的資料
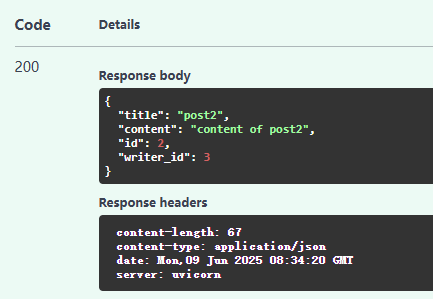
再新增第二個 Post
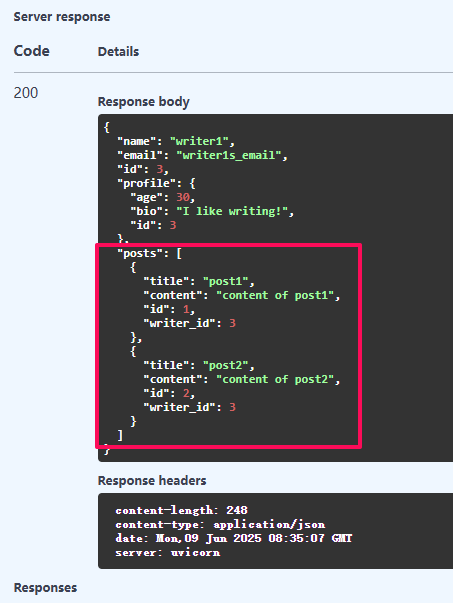
再次查看該 writer 的資料
我們試著把 Post 加在一個不存在的 writer 下
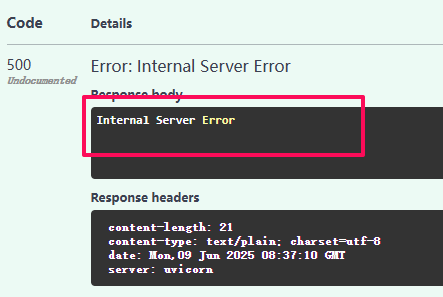
Server Error,更詳細錯誤訊息

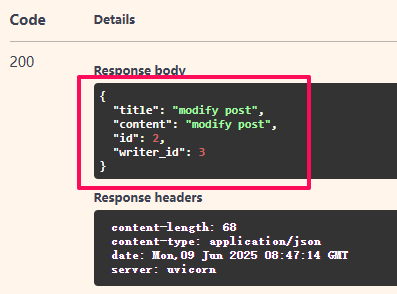
現在我們修改一下之前的 post