常見的關聯類型
| 關係類型 | 說明 | ForeignKey | relationship |
|---|---|---|---|
| 一對一 (1:1) | 每個 user 對應一個 profile | Profile.user_id 並設 unique | uselist=False |
| 一對多 (1:N) | 一個 user 有多個 post | Post.author_id -> users.id | User.posts / Post.author |
| 多對一 (N:1) | 多個 post 對應一個 user | Post.author_id -> users.id | User.posts / Post.author |
| 多對多 (M:N) | 一篇文章有多個標籤,一個標籤對多篇文章 | 需要中介表(association table) | 兩邊都用 relationship(..., secondary=...) |
以下我們來看一下 多對多的關聯吧
多對多關聯
一篇文章(Post)可以有多個標籤(Tag)
一個標籤可以套用在多篇文章上
這種關係屬於「多對多」 Many-to-Many,在 SQLAlchemy 中需要透過一個 「中介表」(association table)來實現。
models/post_tags_table.py
1
2
3
4
5
6
7
8
from sqlalchemy import Table, Column, ForeignKey
from db.database import Base

post_tags = Table(
    "post_tags", Base.metadata,
    Column("post_id", ForeignKey("posts.id"), primary_key=True),
    Column("tag_id", ForeignKey("tags.id"), primary_key=True)
)
models/post_models.py
1
2
3
4
5
6
7
8
9
10
11
12
13
14
15
16
17
from sqlalchemy import Column, Integer, String, ForeignKey
from sqlalchemy.orm import relationship
from db.database import Base
from .post_tags_table import post_tags

class Post(Base):
    __tablename__ = "posts"

    id = Column(Integer, primary_key=True, index=True)
    title = Column(String)
    content = Column(String)

    writer_id = Column(Integer, ForeignKey("writers.id")) # table 的欄位名稱
    writer = relationship("Writer", back_populates="posts") # model Class 名稱, 及該 Class 下對應的欄位名稱

    tags = relationship("Tag", secondary=post_tags, back_populates="posts") # 使用中介表 post_tags
models/post_models.py
1
2
3
4
5
6
7
8
9
10
11
12
13
from sqlalchemy import Column, Integer, String
from sqlalchemy.orm import relationship
from db.database import Base
from .post_tags_table import post_tags

class Tag(Base):
    __tablename__ = "tags"

    id = Column(Integer, primary_key=True)
    name = Column(String, unique=True)

    posts = relationship("Post", secondary=post_tags, back_populates="tags") # 使用中介表 post_tags
為什麼需要中介表
多對多關聯無法直接儲存在單一 table 中如果一篇文章(Post)可以有多個標籤(Tag),而一個標籤又可以屬於多篇文章,就會產生「多對多」關係。
這樣的關聯無法用單純在 posts 或 tags 表中加一個欄位就完成,因為你會需要記錄很多筆「Post 與 Tag 的配對」,只能額外建立一張關聯表來儲存這些配對資料。
關聯資料單獨管理,靈活且清晰 中介表本質上是一張獨立的表格,它可以:
儲存每個 Post 對應哪些 Tag
儲存每個 Tag 被哪些 Post 使用
不需要複製 Tag 名稱或 Post 資訊,節省儲存空間
例如:
| post_id | tag_id |
|---|---|
| 1 | 2 |
| 1 | 3 |
| 2 | 2 |
這代表:
post 1 有 tag 2、3
post 2 也有 tag 2
執行
Tags
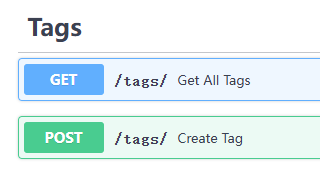
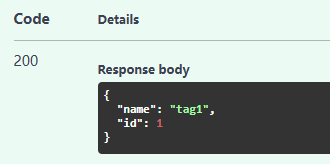
新增 Tags
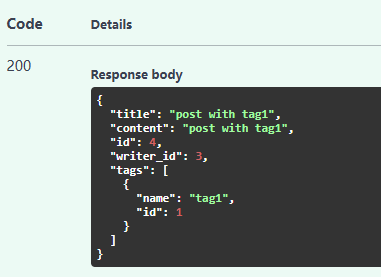
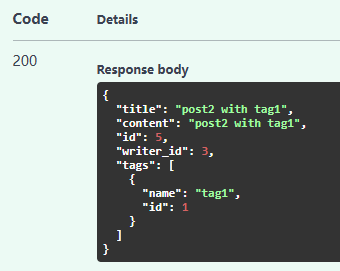
新增 Post with Tags
新增另一個 Post with Tags
查詢 writer 下的 post, 也可以看到對應的 tag
1
2
3
4
5
6
7
8
9
10
11
12
13
14
15
16
17
18
19
20
21
22
23
24
25
26
27
28
29
30
31
32
33
34
35
36
37
38
39
40
41
42
43
44
45
46
47
48
49
50
{
  "name": "writer1",
  "email": "writer1s_email",
  "id": 3,
  "profile": {
    "age": 30,
    "bio": "I like writing!",
    "id": 3
  },
  "posts": [
    {
      "title": "post1",
      "content": "content of post1",
      "id": 1,
      "writer_id": 3,
      "tags": []
    },
    {
      "title": "modify post",
      "content": "modify post",
      "id": 2,
      "writer_id": 3,
      "tags": []
    },
    {
      "title": "post with tag1",
      "content": "post with tag1",
      "id": 4,
      "writer_id": 3,
      "tags": [
        {
          "name": "tag1",
          "id": 1
        }
      ]
    },
    {
      "title": "post2 with tag1",
      "content": "post2 with tag1",
      "id": 5,
      "writer_id": 3,
      "tags": [
        {
          "name": "tag1",
          "id": 1
        }
      ]
    }
  ]
}
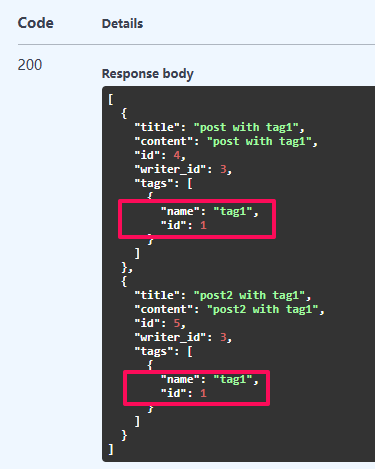
我們來呼叫 Get posts by Tag,可以看到同屬相同 Tag 下的 Post
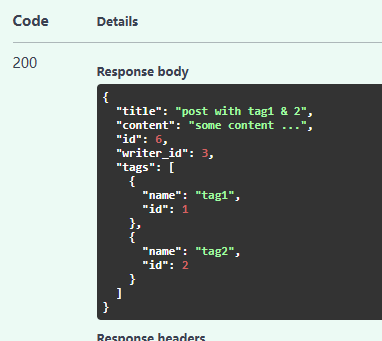
加上一個 Post with 多個 Tag,因為一個文章本來就可能涉及多個主題
功能差不多就是這些了!!!