
Git vs Github vs Gitlab
Let’s Start with a Brief Introduction:
Git is a distributed version control system designed to handle everything from small to very large projects efficiently. Its main features include:
- Distributed Development: Each developer has a local copy of the entire repository history.
- Branching and Merging: Git allows developers to create branches to work independently on different features or fixes, which can then be merged back into the main branch upon completion.
- Speed and Performance: Git is optimized for performance, making it capable of efficiently handling large projects.
GitHub s a web-based platform that uses Git for version control. It provides a collaborative environment for developers to host and review code, manage projects, and build software. Since it uses Git for version control, it includes all the features of Git and adds the following:
- Issues: Track tasks, feature enhancements, and bug reports.
- Actions: Automate workflows such as continuous integration and deployment.
- Social Coding: Developers can follow other people’s repositories on GitHub, enabling collaborative development and learning.
Similar to GitHub, GitLab is a web-based platform based on Git, but it has a broader scope, encompassing not just code management but also the entire DevOps lifecycle. This includes:
CI/CD (Continuous Integration/Continuous Deployment): GitLab has built-in CI/CD tools that automate testing and deployment processes.
Demonstration of Using GitHub for Development
Follow GitHub’s instructions to register. There’s nothing special to explain here.

After successfully registering and logging in, let’s proceed with our tutorial.
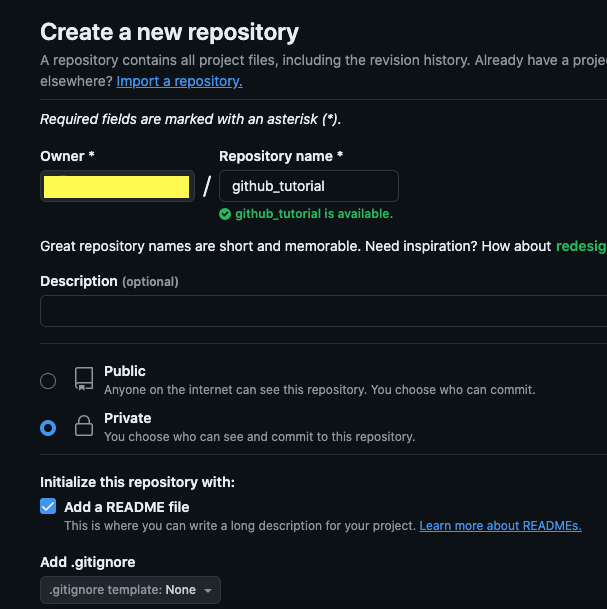
step 1 : create repository
A repository (often shortened to repo) is where you store your code.
Fill in the repo information and check the option to automatically add a README. Then, create the repository.
Once the repo is created, you will see a main branch and the README file. This is why we recommended adding a README; it automatically initializes a branch on the server.

step 2 : Download a GUI for Version Control
(Recommended GUIs by Git)[https://git-scm.com/downloads/guis/]
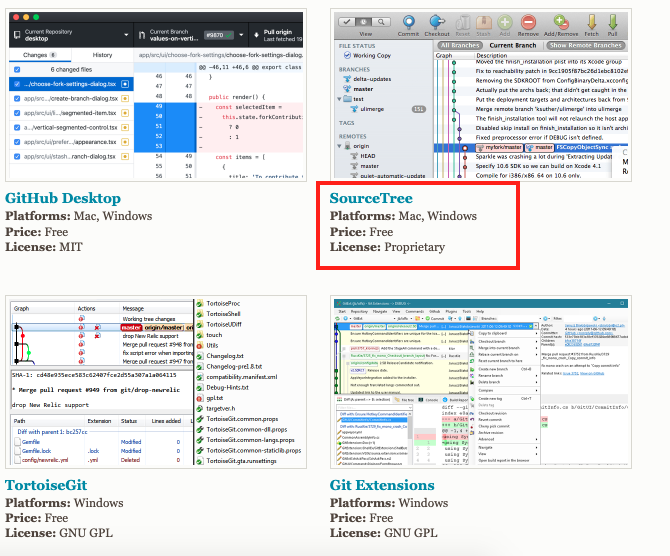
In this demonstration, we will use Sourcetree.
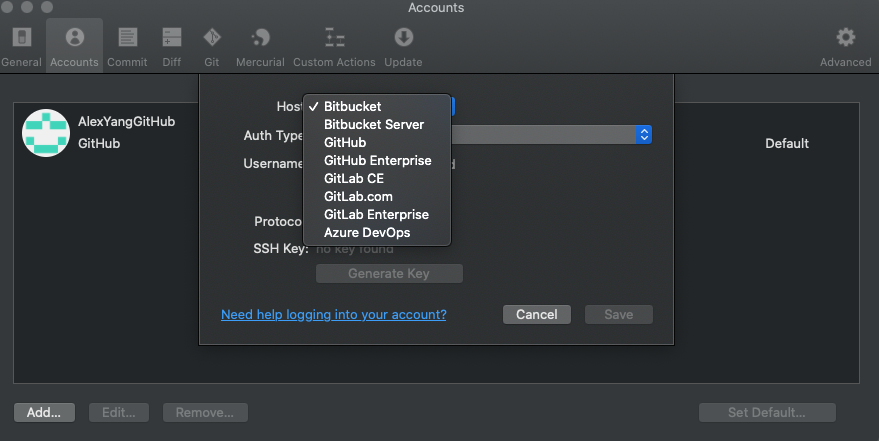
step 3 : Connect GitHub with Sourcetree
Open Sourcetree and find the accounts section to add the GitHub account you just created.
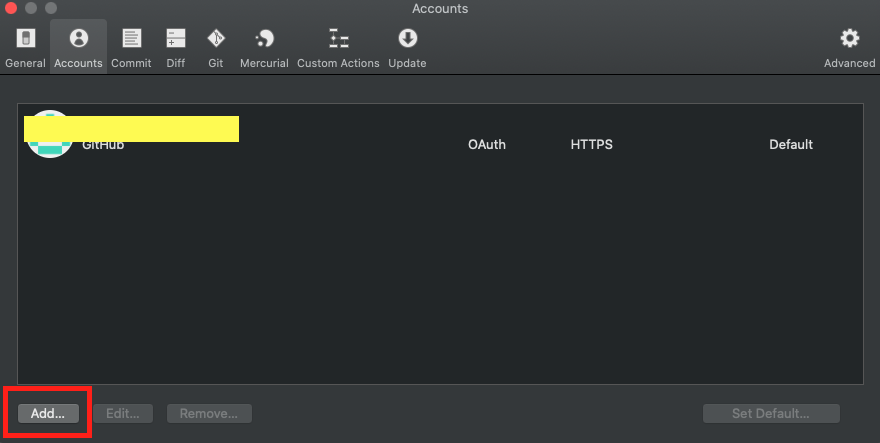
Select GitHub
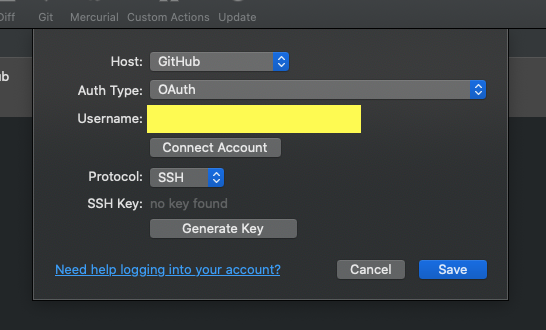
Click on “Connect Account.”

A webpage will open for authentication.
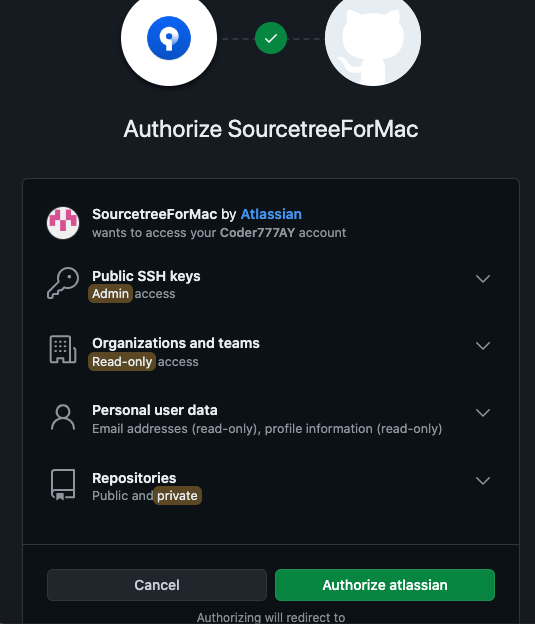
After completing the authentication process, you will see your account in Sourcetree.
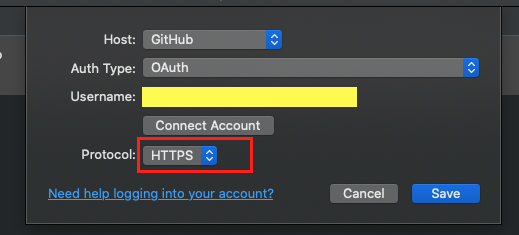
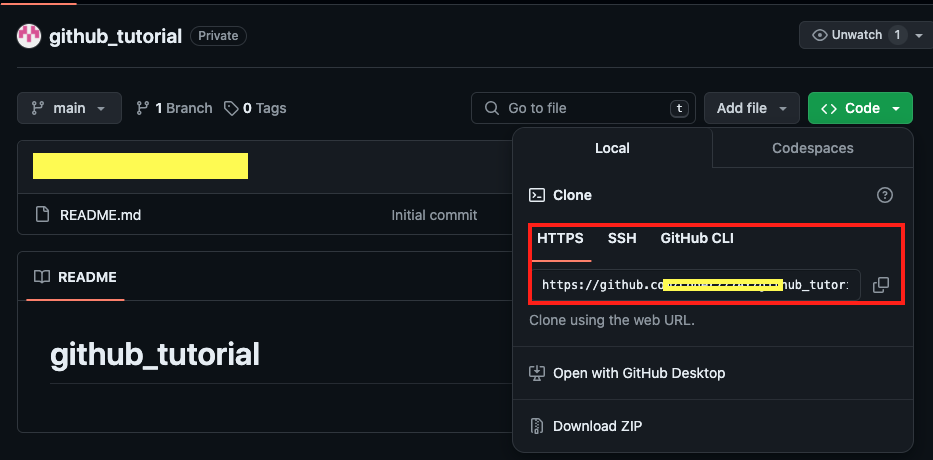
Choose https as the protocol.
Copy the URL of your GitHub repository from the webpage.
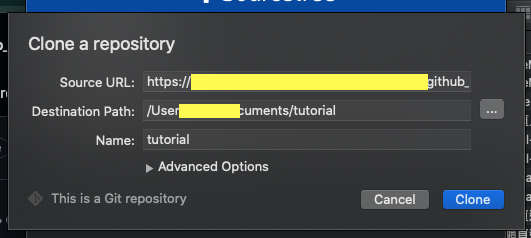
Clone the repository in Sourcetree.
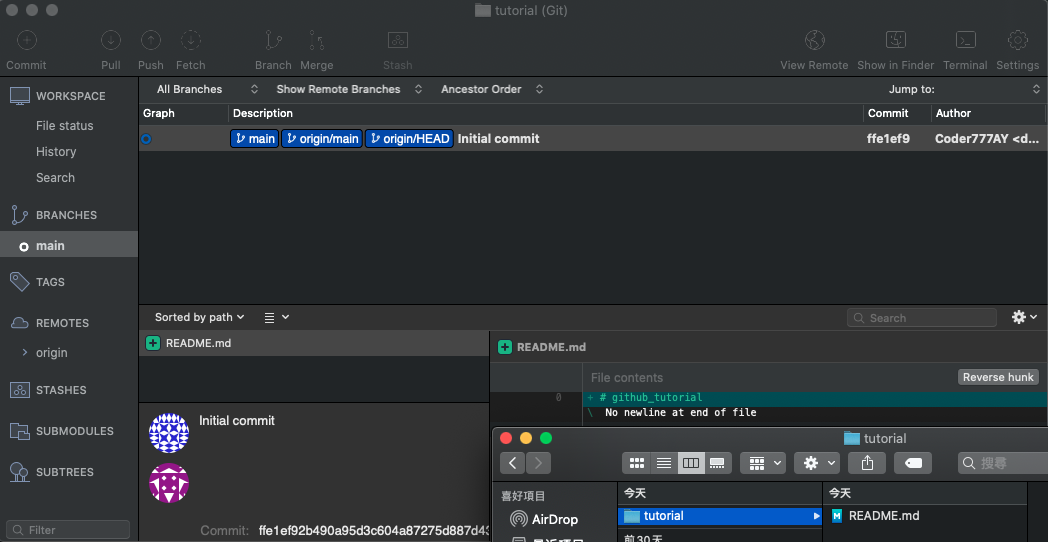
You should see the README file from the repository.
Congratulations! You have completed the setup. Happy coding!