
為什麼需要 OAuth
生活當中我們常用的服務越來越多了,這時候會發現,如果每種服務都要記一組帳號,常常會”忘記密碼”,不然就是所有的帳密都是同一組,這是很危險的。
OAuth 可以幫助我們使用既有的帳號做第三方應用的登入,常見的有 google, facebook, wechat..等。這樣不只使用者不用記住各種密碼,對於服務的提供者,也不用存下敏感的使用者資料,提高了資訊的安全性。
Google OAuth 2.0 設定
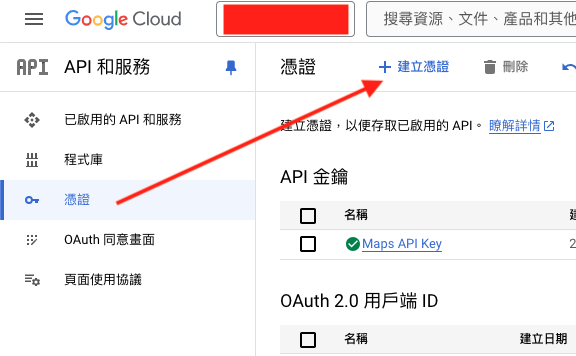
到 Google Cloud Console -> API 和服務 -> 憑證 -> 建立憑證
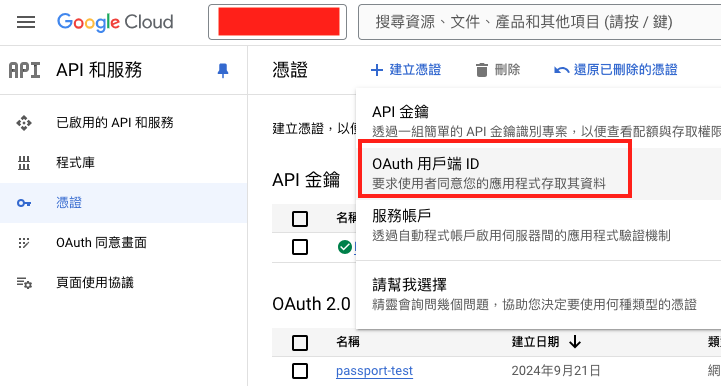
選 OAuth 用戶端 ID
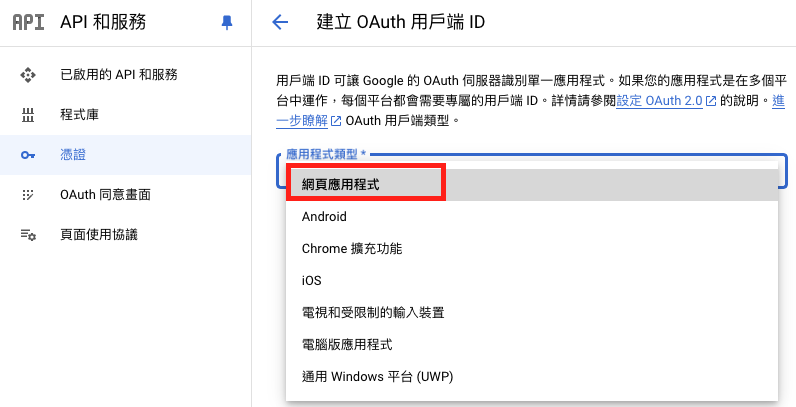
網頁應用程式(這邊選你自己的應用程式吧)
輸入允許的 domain, 這邊會和你的 server code 搭配
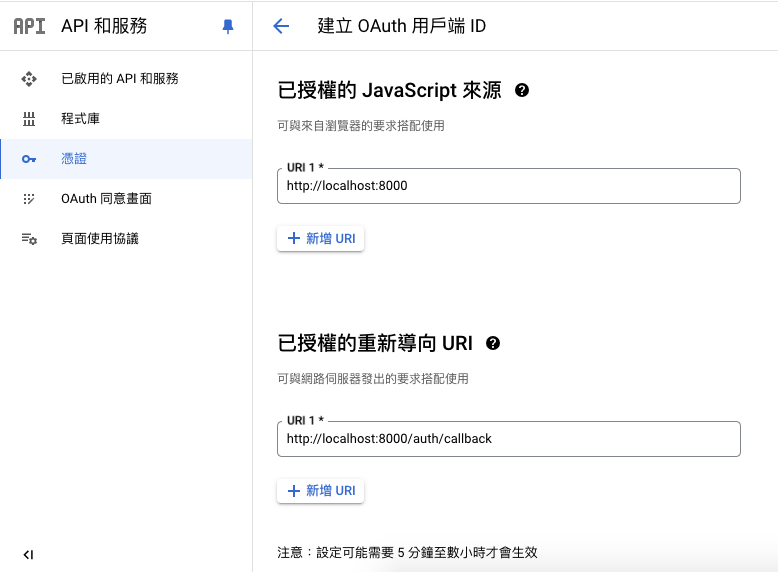
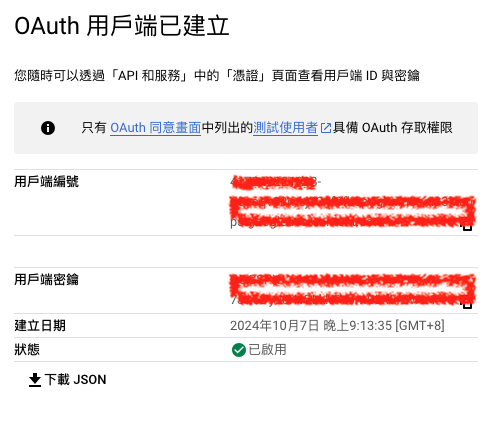
完成後,得到 GOOGLE_CLIENT_ID 和 GOOGLE_CLIENT_SECRET 記下來,等等 code 也會用上。
codes
透過以下4 個檔案完成 OAuth
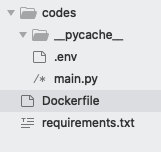
main.py
1
2
3
4
5
6
7
8
9
10
11
12
13
14
15
16
17
18
19
20
21
22
23
24
25
26
27
28
29
30
31
32
33
34
35
36
37
38
39
40
41
42
43
44
45
46
47
48
49
from fastapi import FastAPI, Depends, HTTPException
from fastapi.security import OAuth2AuthorizationCodeBearer
from google.auth.transport import requests
from google.oauth2 import id_token
from requests_oauthlib import OAuth2Session
from starlette.responses import RedirectResponse
from dotenv import load_dotenv
import os

load_dotenv()

app = FastAPI()

# OAuth 2.0 settings
client_id = os.getenv("GOOGLE_CLIENT_ID")
client_secret = os.getenv("GOOGLE_CLIENT_SECRET")
redirect_uri = os.getenv("GOOGLE_REDIRECT_URI")
authorization_base_url = "https://accounts.google.com/o/oauth2/auth"
token_url = "https://oauth2.googleapis.com/token"
print(client_id,client_secret,redirect_uri)
# OAuth 2.0 flow initialization
oauth = OAuth2Session(client_id, redirect_uri=redirect_uri, scope=[
        "https://www.googleapis.com/auth/userinfo.email",
        "https://www.googleapis.com/auth/userinfo.profile",
        "openid"
    ])

# 跳轉到 Google 認證頁面
@app.get("/auth/login")
def login():
    print("login()")
    authorization_url, state = oauth.authorization_url(authorization_base_url, access_type="offline")
    return RedirectResponse(authorization_url)

# Google 認證完成後的回調處理
@app.get("/auth/callback")
def callback(code: str):
    print("callback()")
    try:
        # 交換 authorization code 取得 token
        token = oauth.fetch_token(token_url, code=code, client_secret=client_secret)
        # 使用 token 獲取用戶資訊
        user_info = oauth.get("https://www.googleapis.com/oauth2/v1/userinfo").json()
        return user_info

    except Exception as e:
        print(f"Error during OAuth callback: {e}")  # 打印詳細的錯誤訊息
        raise HTTPException(status_code=400, detail="Error during OAuth callback")
.env 檔案內容

dockerfile
1
2
3
4
5
6
7
8
9
10
11
12
13
14
15
16
17
18
19
# Use an official Python runtime as a parent image
FROM python:3.9-slim-buster

# Set the working directory to /app
WORKDIR /app

# Copy the requirements file into the container at /app
COPY requirements.txt .

# Install any needed packages specified in requirements.txt
RUN pip install --no-cache-dir --upgrade pip && \
    pip install --no-cache-dir -r requirements.txt && \
    rm -rf /root/.cache/pip/*

# Copy the rest of the application code into the container at /app
COPY . .

# Expose the port that Django runs on
EXPOSE 8000
requirements.txt
1
2
3
4
5
6
fastapi
uvicorn
psycopg2-binary
google-auth
requests-oauthlib
python-dotenv
在 container 中透過指令啟動 fastapi 的服務
1
uvicorn main:app --reload --host 0.0.0.0 --port 8000
結果
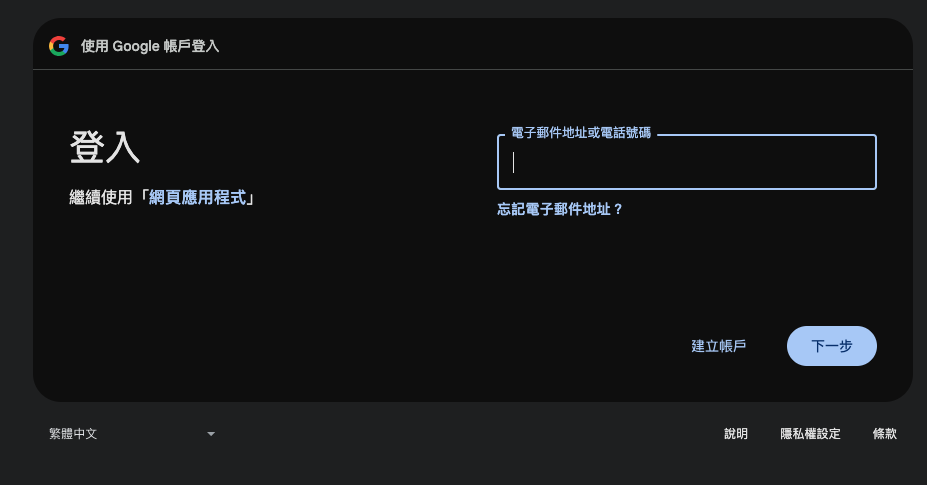
如果你沒登入會要求要登入
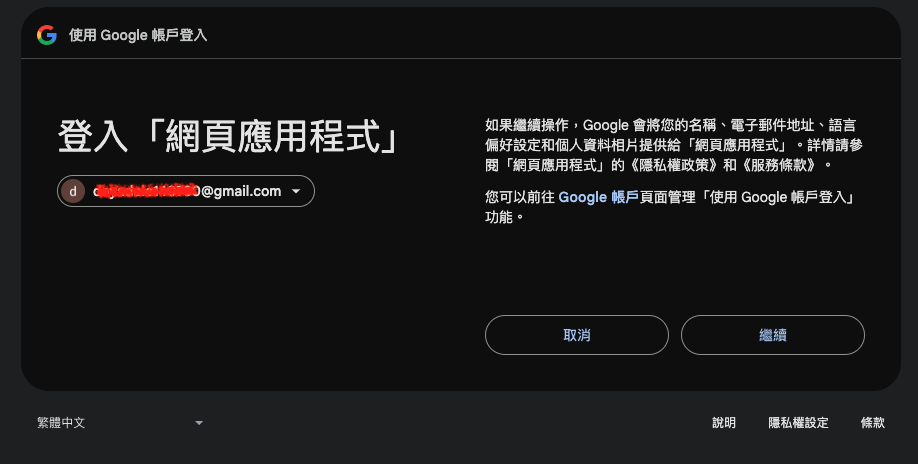
如果你已登入,會請你選帳號

選好帳號後會告知有哪些資訊傳給此服務
完成後,就會 call main.py 中的 callback function.
因為 callback 回去的資料滿滿都是個人的資料,所以就不截圖了。
哈